Summary: in this tutorial, we will show you how to install PostgreSQL in your local system for learning and practicing PostgreSQL.
PostgreSQL was developed for UNIX-like platforms, however, it was designed to be portable. It means that PostgreSQL can also run on other platforms such as Mac OS X, Solaris, and Windows.
Since version 8.0, PostgreSQL offers an installer for Windows systems that makes the installation process easier and faster. For development purpose, we will install PostgreSQL version 9.5 on Windows 10.
NOTE: If you are running the Windows 8 and 10, you need to create a Windows users with administrator role e.g., postgres and use this user to run the installation file. See the troubleshooting section below for the detailed information.
There are three steps to complete the PostgreSQL installation:
- Download PostgreSQL installer for Windows
- Install PostgreSQL
- Verify the installation
Download PostgreSQL Installer for Windows
You need to download the installer from PostgreSQL Official website.
- Go to the PostgreSQL official website, download section for Windows http://www.postgresql.org/download/windows/
- Click on the download installer from EnterpriseDB
- Choose the latest version to download. It takes few minutes to complete the download.
Install PostgreSQL step by step
Double click on the installer file, an installation wizard will appear and guide you through multiple steps where you can choose different options that you would like to have in PostgreSQL.

The following illustrates each step and its options for installation. If you install a different version, you may get additional steps.
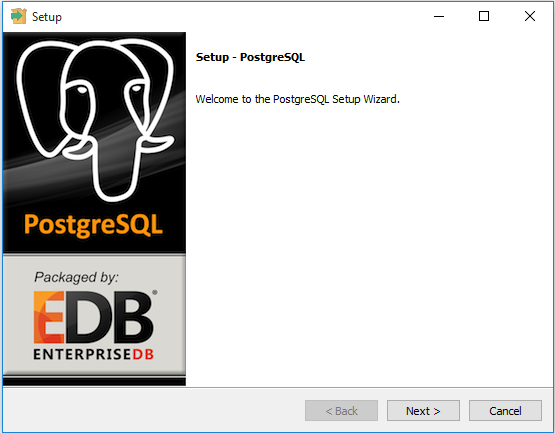
Start Installing PostgreSQL
Specify installation folder, choose your own or keep the default folder suggested by PostgreSQL installer.
Enter the password for the database superuser and service account.

Enter the port for PostgreSQL. Make sure that no other applications are using this port. Leave it as default if you are unsure.

Choose the default locale used by the database.

You’ve completed providing information for the PostgreSQL installer. Click the Next button to install PostgreSQL

The installation may take few minutes to complete.
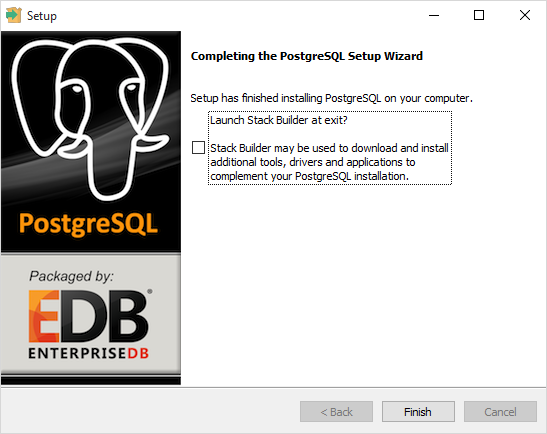
Click the Finish button to complete the PostgreSQL installation.
Verify the Installation
There are several ways to verify the installation. You can try to connect to the PostgreSQL database server from any client application e.g., psql, pgAdmin, etc.
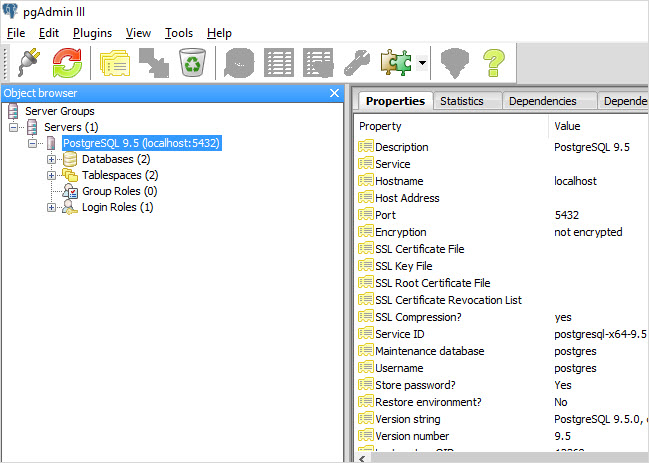
The quick way to verify the installation is through the pgAdmin application.
First, click on pgAdmin III to launch it. The pgAdmin III GUI will display.


Second, double click on PostgreSQL 9.5 on the object browser. It will ask you for the admin password. Just enter the password you’ve used in the installation step.

Third, if everything is fine, the pgAdmin will display all the objects that belong to the server.
Congratulation! you’ve successfully installed PostgreSQL database server in your local system. Let’s learn various ways to connect to PostgreSQL database server.
Troubleshooting
In case you receive the following error message while installing PostgreSQL in Windows OS (Windows 8 or Windows 10):
Failed to load sql modules into the database cluster
and the following error message displays:
Error running post install step. Installation may not complete correctly. Error reading C:/Program Files/PostgreSQL/9.5/postgresql.conf
You need to do the following steps:
- Uninstall the PostgreSQL and delete the data directory in the installation folder.
- Create a new Windows user named
postgresand add it to the Administrators group. - Restart your computer.
- Open cmd (command prompt) as the postgres command using the following command:
runas /user:postgres cmd.exe - A new window appears, you need to run the installer file from this window.